Bathymetry and terrain data
Last reviewed version: 2.20Data sources
The first steps to import bathymetry into AquaSim is to first obtain the suitable data. AquaEdit will allow importing data exported from a few different sources.
- Data exported from Olex in either .gz format (the default exported compressed format) or with the uncompressed file with .olex as the extension
- Scans from TerraScan software
- Data exported from PLS-CADD software
- Data from the SRTM project in 1 or 3 degree resolution (primarily above terrain above water, not bathymetry)
- Data from the Norwegian mapping authority
The 3 first options are added to the model using the Add button under Additional datasets and selecting the file for import.
SRTM/HGT data
SRTM data is in the HGT format (other sources are also available). AquaEdit expects to find these files in the Shapes directory (which can be found under File -> Settings -> Folders) under a subdirectory called “map”, HGT 1 degree data is placed under map\hgt1 and HGT 3 data is placed under map\hgt3.
AquaEdit will select the required files to cover the import area automatically.
This data can be used to augment bathymetry when working close to the shore, however, misalignments can happen.
Norwegian mapping authority
For data obtained from “Kartverket” the data is expected to be located in the shapes\map folder, named based on the county “AGD.txt, FI.txt, HO.txt, MR.txt, NO.txt, TRL.txt, RO.txt, SF.txt”
This data must be purchased and is subject to restrictions.
Projections
Projections to a flat plane is done using the (simplified) Mercator projection centered around the 0, 0 coordinate for less distortion, using the WGS84 datum.
Import parameters
Importing bathymetry assumes the user knows the coordinate the user wishes to use as the centre of the model. This point will be assumed in the 0, 0 coordinate in AquaEdit.
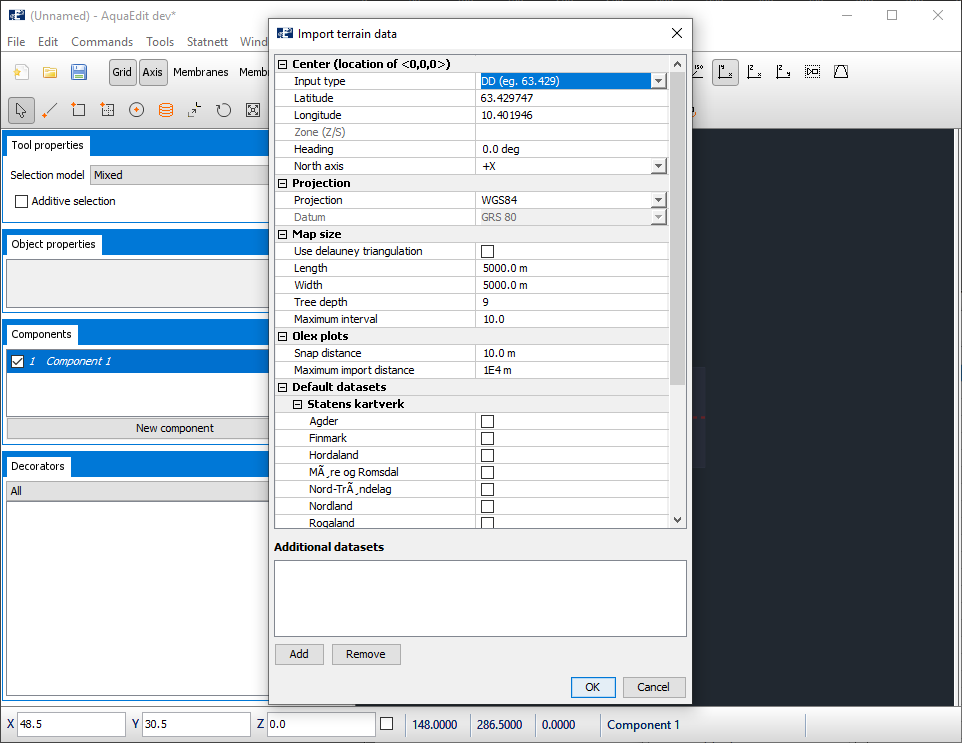
The coordinate can be inputted in one of 4 formats.
- DD (Decimal Degree) with a single value denoting the latitude or longitude (eg 63.429)
- DM (Decimal minute) with the hour and minute components split in two (eg 63 25.78)
- DMS (Decimal minute second) with all three components split into separate fields where seconds can be in decimals (eg 63 25 47.08)
- UTM where the user specifies Northing, Easting, and the Zone (note, these will be calculated back to DD format)
In addition, a heading can be specified to rotate the imported area. This is useful for drawing the installation along the X or Y axis instead of having to draw in a slanted direction.
Map size
The imported size of the terrain cen be limited using the Length and Width parameters. This will denote the largest area to import and data outside of this range will be discarded.
Advanced topics
The option “Use delauney triangulation” can be used if the data is of good quality. By default AquaEdit filters the data to create a less demanding terrain, but also to clean up artifacts of the data. Using delauney triangulation will use all the available data the way it is presented in the input files.
We recommend experimenting with this option to see if it produces a good result. The resulting terrain will be more demanding.
The options Tree depth and Maximum interval will only be used if Delauney triangulation is not used and controls parameters of the quad grid method used for optimizing and smoothing the terrain. We recommend experimenting with these values to produce a good result. Tree depth is recommended between 8 and 12, maximum interval is recommended between 2 and 12. The effect of these parameters will depend on the terrain given for triangulation.
Olex plots
Olex has the ability to export geometry drawn in its application. This can also be exported and imported into AquaEdit. The parameters under “Olex plots” help control the import of these. To import these plots use the Add button under Additional datasets and select “Olex geometry (*.gz file)”. This is required to let AquaEdit know that this is geometry, not bathymetry data.
Default datasets
If the territorial bathymetry maps for Norway has been placed into the correct folders the counties will be shown here and can be selected for import.
SRTM data for 1" or 3" can also be selected and will be imported automatically if the correct maps have been placed into the folder. Do not use both 1" and 3" data at the same time as these will cover the same areas but in different resolution.
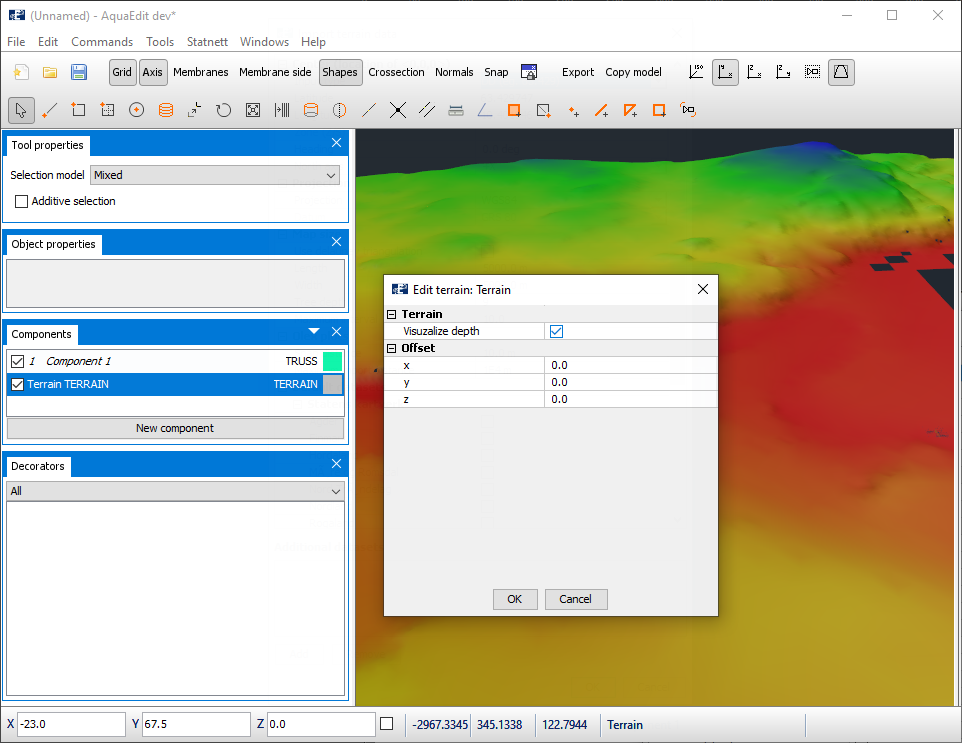
Using terrain
After a successful import the terrain will be visible in AquaEdit. The properties of the terrain allows visualizing the depth as a colour spectrum
Snapping nodes
After terrain has been imported the easiest way to interact with it is to use the Snap node to terrain function under Commands -> Nodes on the application menu.
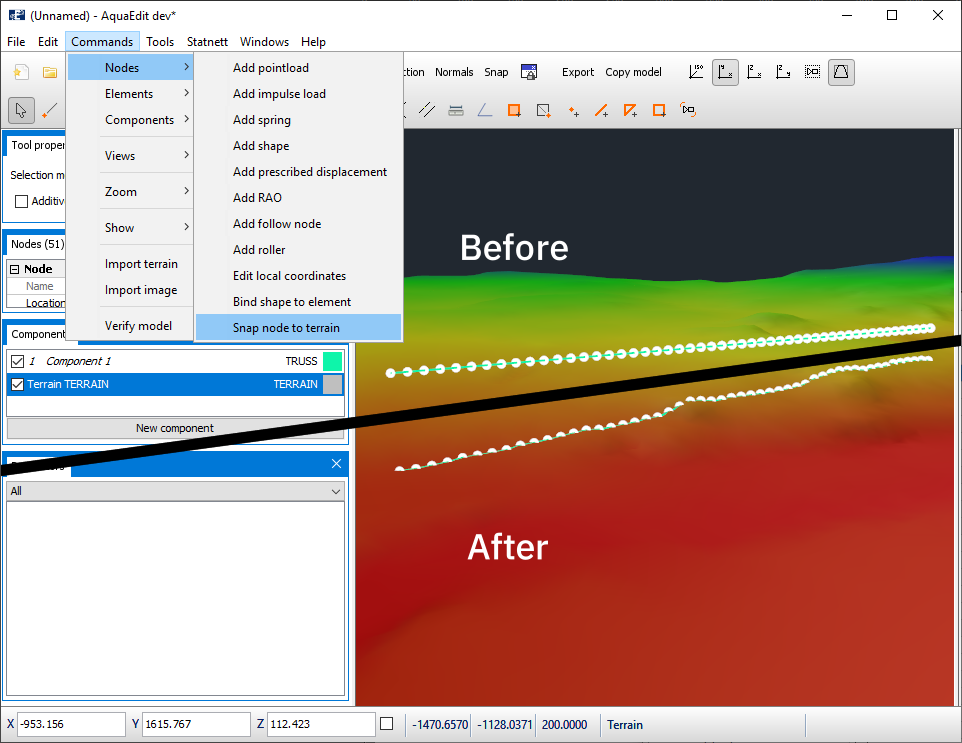
Anchor chains are often modelled and snapped to the bottom with bottom springs added to them to correctly deform in the analysis. This is more performant than using the terrain in the actual analysis.