Case study – Save turbine to library
Last reviewed version: 2.19In this section, some routines for saving to library is presented. In order to create a turbine in AquaSim from the Generate turbine-tool, you will need three sets of xml-files describing the following:
- Blade segment cross-section properties (E-modulus, area, weight, drag, lift etc.),
- Blade sections (segment length, prebend, twist),
- Nave- Inner- and Outer (E-modulus, area, weight, drag).
Save segment cross-section properties to library
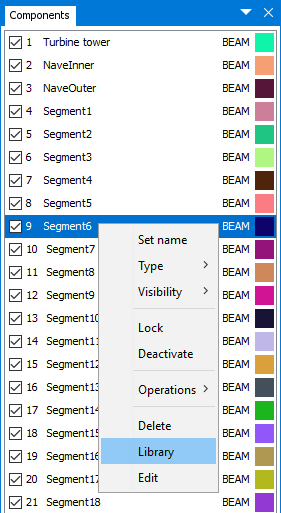
Saving to library is quite simple in AquaEdit. We start with the model from the previous case study. Navigate to the Components-window and left-click on one of the segments.
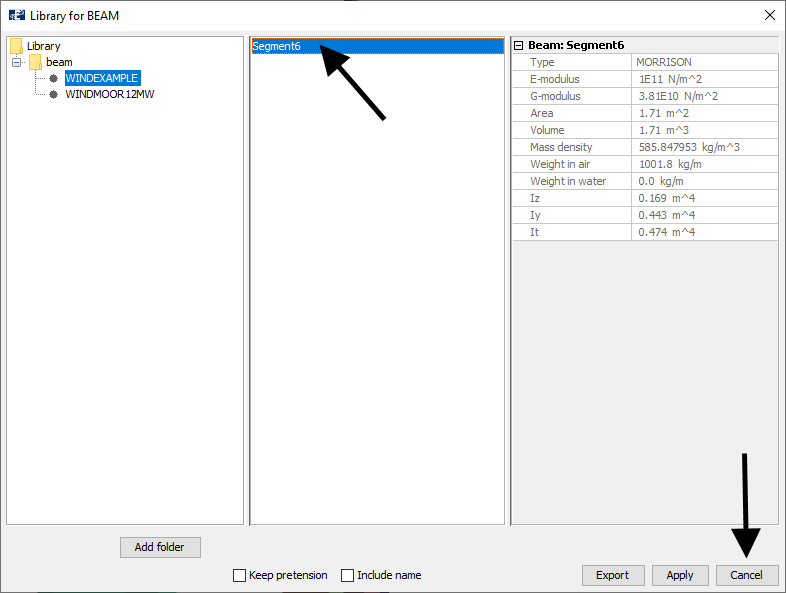
In the figure below, we have chosen Segment 6. Then right-click and select Library.
In order to use these cross-sectional data on turbines on a later occasion, they must be stored in the folder AquaSim\Library\beam. In this case, the sub-folder WINDEXAMPLE has been established in advance, see the figure below.
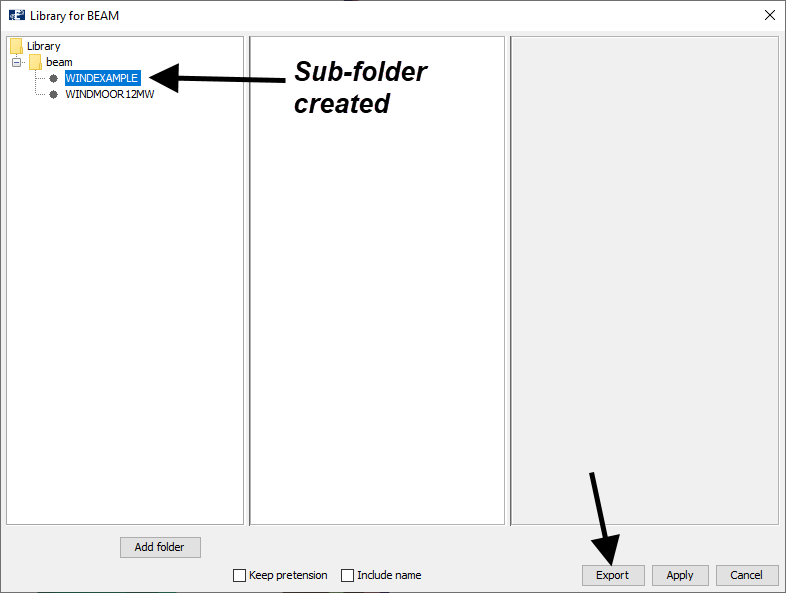
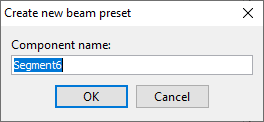
To be able to store Segment 6 within the WINDEXAMPLE-folder, select this and then press Export in the lower right corner. You can the give the beam a new name or keep what is suggested. Default is that AquaEdit suggest the same as the component name. We accept this and select OK.
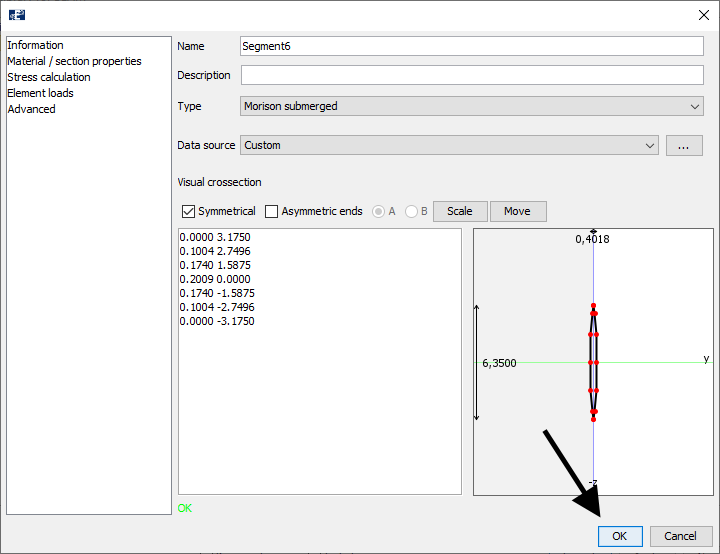
The Edit beam-window will automatically be opened, allowing you to adjust or change input before saving to the library. We do not want to change anything, hence select OK.
You are asked if you want to save the change, select Yes to this. Segment 6 is the successfully stored to the library and will be visible from the middle section.
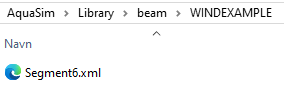
The cross-sectional properties are now stored as an xml-file in the following folder AquaSim\Library\beam\WINDEXAMPLE. Remember this for the next sections, where we are going to save both blade section and nave cross-sectional properties.
Saving of segment cross-sectional properties are now finished. You may exit the Library for BEAM-window by selecting Cancel.
Save nave to library
As per AquaSim version 2.19.0, there must exist xml-files describing the components NaveInner and NaveOuter in order to generate a wind turbine from a library. The nave can be saved in two ways:
-
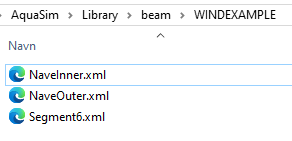
If you do not have any established components for NaveInner or NaveOuter you may copy the xml-files from AquaSim\Library\beam\WINDMOOR12MW to WINDEXAMPLE.
-
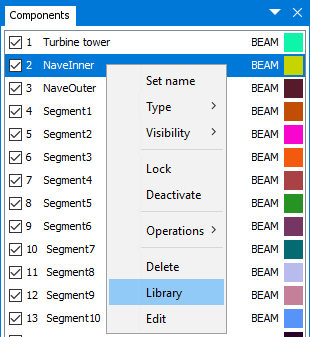
If you have established components for NaveInner and NaveOuter in AquaEdit, you may follow the same procedure as described in the previous section Save segment cross-section properties to library. The xml-files should be stored in the WINDEXAMPLE-folder.
Save blade sections to library
Blade sections defined in the Generate turbine-tool may also be saved to library. Open AquaEdit and draw vertical beam element in the 3D window. Right click the element select Elements > Other > Create turbine on element. Then select Add row, as shown in the figure below.
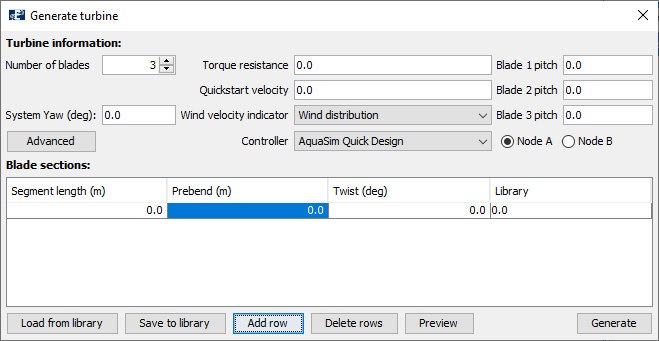
Let us say you have data for Segment length, Prebend and Twist for Segment6 that you saved earlier. Type in the data as given in the table below.
| Segment length (m) | Prebend (m) | Twist (deg) |
|---|---|---|
| 5 | 2 | 1.5 |
Rember that we earlier in this tutorial said that the Library-column is coded to point to the folder AquaSim\Library\beam. We have saved the cross-sectional data for Segment6 in WINDEXAMPLE. Therefor, in the Library column, you should type WINDEXAMPLE\Segment6.
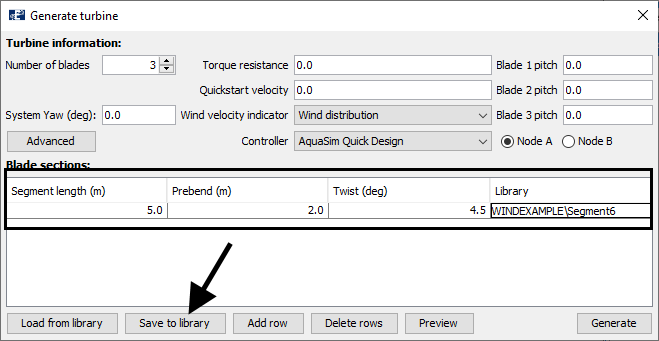
To make the turbine model complete, you must also include the path for NaveInner and NaveOuter. Select the Advanced-option and navigate down to the Nave-section
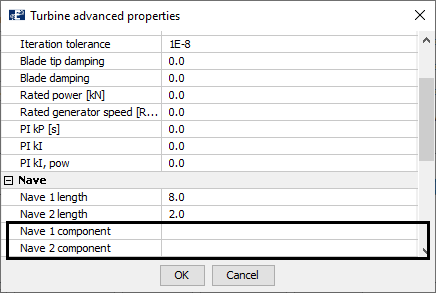
In the section, Nave 1 component will correspond to NaveInner and Nave 2 component is the NaveOuter. In the empty sections, the path to where the xml-files for the naves should be entered. As for Library, this part is coded to point to the folder AquaSim\Library\beam. We should then type what is shown in the figure below.
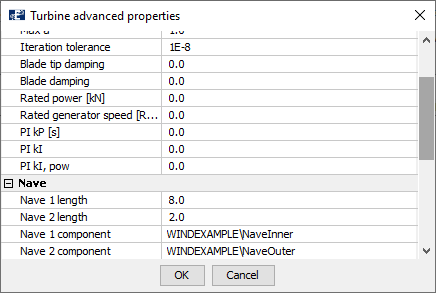
In the Advanced-window, select OK.
Save turbine to library
The information can now be saved to library. In the Generate turbine-tool window select Save to library. This will automatically point to the folder AquaSim\Library\Turbine. Type an appropriate name, we chose WINDEXAMPLE.
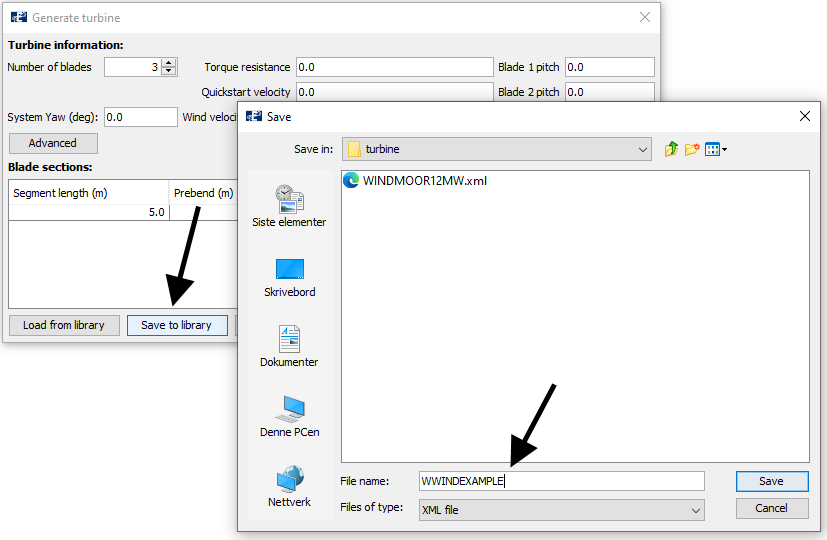
Now, this turbine is complete and WINDEXAMPLE can be implemented to a new model by following the procedures described in the first case study.