AquaEdit
Last reviewed version: 2.18.0Load the AquaSim model Feces.amodel that comes with this tutorial.
Note that a terrain model (.obj) is associated with this case study. Upon down-loading this tutorial, this file should be stored in the same folder as the AquaSim model. This to make sure it is available in your model.
The key to model feces is to model an object having the correct relation between drag, weight and buoyancy, so that it has the same relation as feces. Both a truss and a beam element can be applied to resemble this.
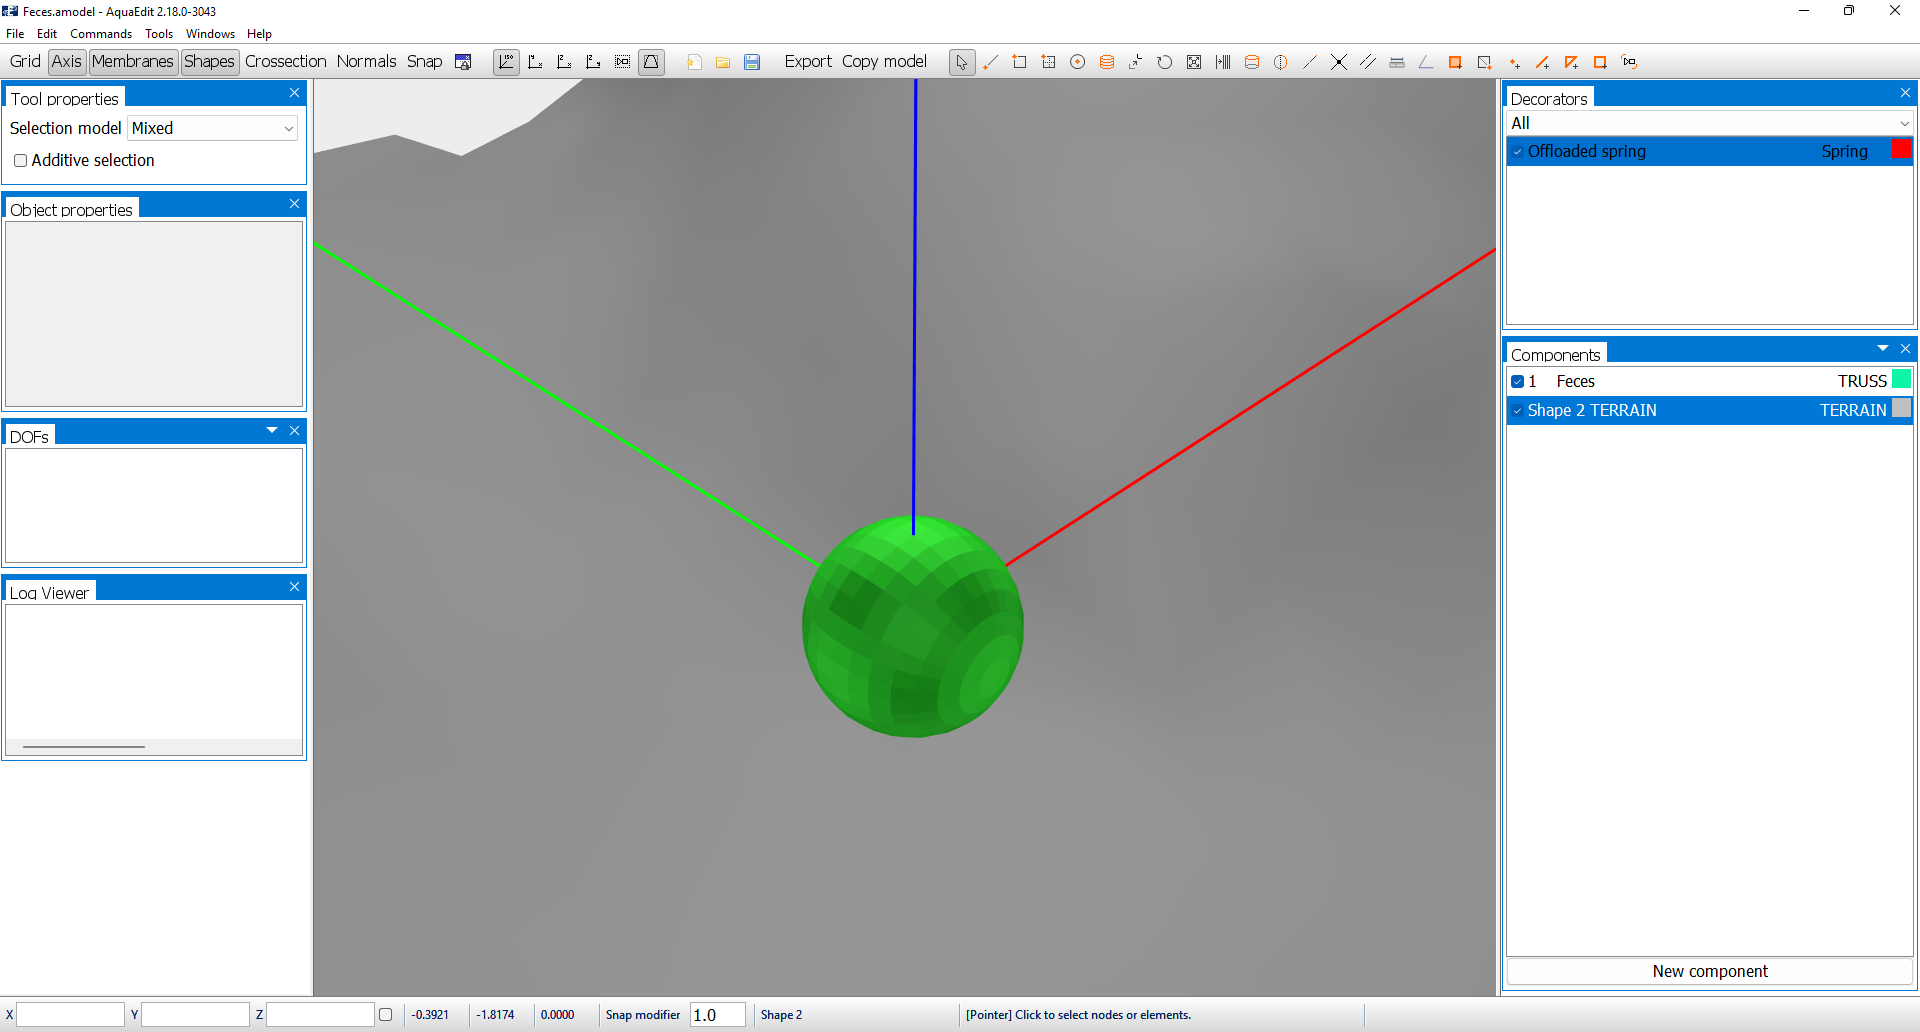
In AquaEdit, a small truss element has been modelled. Double click component 1 Feces in the component window to view the properties.
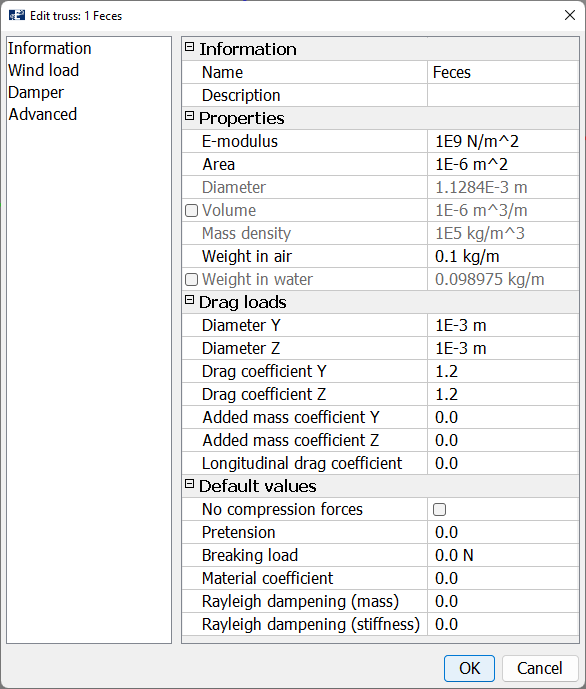
The feces is modelled as a Truss component. A small area of 1.0E-06 m2 and weight of approximately 0.1 kg/m is applied. Drag is applied, this is seen by the values in the Drag loads section. We are satisfied with these values and select OK.
The purpose of the case study is to let the feces fall freely to the bottom and see how it slides along the seabed. This will lead to large initial vertical translation in the analysis. Large response over a short period of time may induce numerical challenges, and to make the start of the analysis more stable a spring is assigned to the Truss component. This is seen in the Decorators window in AquaEdit.
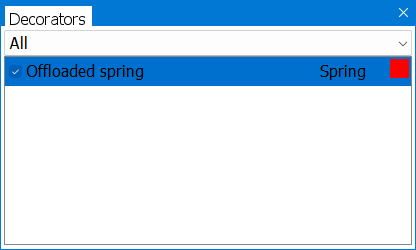
Double click this to enter the Edit spring-dialogue.
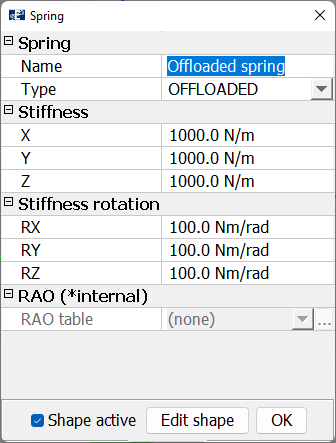
The spring is of type Offloaded. This type of spring has a constant spring stiffness in the static initial steps (defined by Preincrement in the Export menu) of the analysis. When the dynamic part starts, the spring stiffness is removed. Both, translatory and rotational stiffness is applied to the feces.
Shapes can also be added to springs, in the lower section you find options for this. By toggle on Shape active and Edit shape you can add custom shapes. Shapes are object-files without any properties, meaning that it does not contribute to any hydrodynamical properties. The sphere you see in the 3D window of AquaEdit is a type of shape that is assigned to the spring. Exit the shape- and spring window.
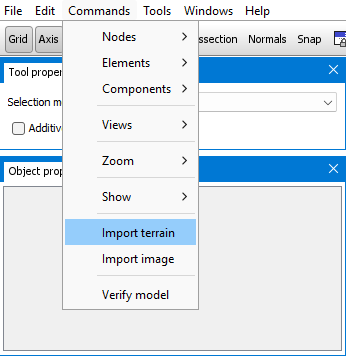
A bottom can be added through Import terrain. This is found by selecting Commands > Import terrain.
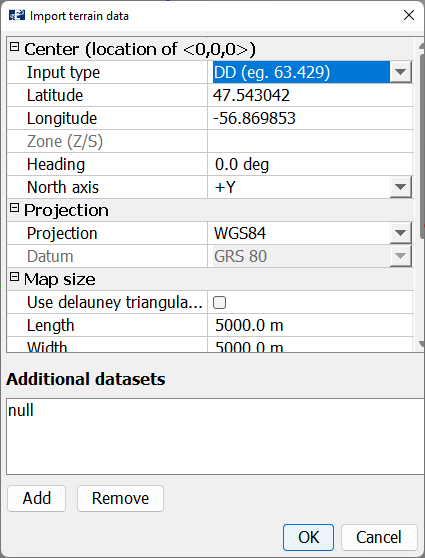
For AquaEdit to be able to use the terrain, it needs to know where to put it. This is defined in the Center (location of <0,0,0>) section. Further, one can adjust the Projection plane, Map size and other options to customize the terrain model. In the lower section, you have Additional datasets. This is where you import the terrain model through selecting Add. You may add one or more datasets.
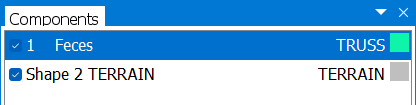
When the terrain is imported, it will appear as a shape in the Components window. The visibility of this can be toggled on and off.
As mentioned, shapes are object-files without any properties. So, the terrain will need to be assigned some bottom properties. If the analysis had been conducted only on the basis of the terrain shape, the feces would have just fall through the terrain. Bottom properties are found in the Export menu.